Hello! And welcome to the very first installment of my absolute beginner’s guide to learning how to crochet. Throughout these lessons I will help you build your confidence and knowledge in crocheting so you can add a new hobby and skill to your collection. If you have been itching to learn a new craft but feel overwhelmed where to start, this guide is for YOU! In this first lesson, I will help frame your mindset around crocheting as well as go over the perfect tools you need to start out and by the end you will have successfully crocheted for the first time!
Some Background on Crochet
Crochet has been around for a very long time, earning it’s stereotype as a “grandma hobby” to the younger generations. Like knitting, you are creating basically sheets of fabric with your hands, a tool, and some type of fiber. With the knowledge you learn through this guide, you will be fully equipped to take this “grandma hobby” and put your own twist on it and reclaim it. Now I’m not going to bore you with a history lesson on crochet so let’s get into this.
So back when I was a little girl, my grandmother taught me how to crochet. I remember it feeling so frustrating and defeating that I wanted to give up constantly. Flash forward to now, I love crocheting. It is a great hobby that I am working on turning into my livelihood – and you can too! The first step to anything is always starting (and it always happens to be the hardest part).
But that’s why I’m here with you! We got this. Don’t even worry. Like starting any new thing, no one is going to be an expert right off the bat – it takes practice so I want you to get out of the perfectionist mindset and just let the yarn do it’s thing – you will find that crochet is a very forgiving craft so there’s no need to stress. It will take some time before you build up the muscle memory in your hands and wrists so make sure you stick with it and practice at for at least 30 minutes a day in the beginning.
Let’s Talk Materials
So you’ve decided that you want to start crocheting and you’re at the craft store overwhelmed with options. Here’s a breakdown of what materials you absolutely need as a beginner.
Hooks
When you start crocheting, there are a few different options for hooks. You can get starter kits, you can get two packs, you can buy them by size, you can get metal, plastic, or wooden hooks. Needless to say you have a lot of option to choose from. Personally, I bought a starter kit with 8 ergonomic handle hook sizes and a nice little travel case. If you think you are going to stick with this, then I would invest in one of the starter kits because then you already have all the common hook sizes to complete any project you work your way up to.
Now, if you are just trying this out on a whim then I would recommend buying one 5mm sized hook. Any material works for these hooks but plastic of course will break for easily that metal so keep that in mind. As for ergonomic handles vs not that is truly a preference. You don’t need tons of fancy equipment to start this.
Yarn
Now your probably staring at a wall full of yarn not knowing what to pick. All yarn is good yarn for something or other but when just starting out, it is very important what yarn you pick for ease of learning and less frustration. You may be tempted to grab the pretty, frilly yarn but not yet – we will get there don’t worry!
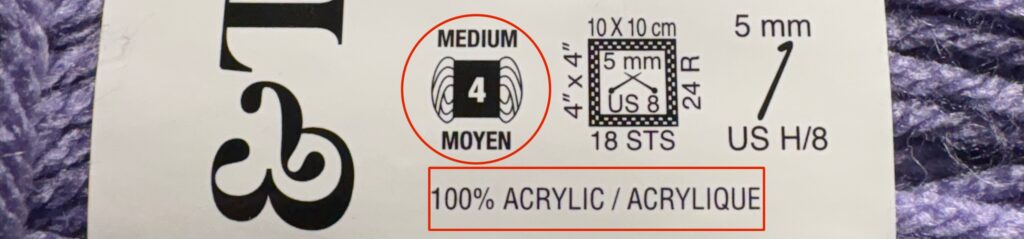
When first starting out I strongly recommend working only with 100% acrylic weight 4 yarn. This will be your cheapest, and most available yarn as well as the most common type of yarn you will work with.
The label will look something like this, depending on the brand, with the two circled elements being the ones to look out for:
Extras
While your in the fiber arts section of the craft store you’ll probably see a bunch of other accessories that you may be wondering if you need. 9 times out of 10, you don’t NEED them but they can sometimes make your life a little easier. In another post I will go into how you can actually use a lot of household objects you already have as stitch markers which you can read here. The one “extra” item I would suggest you pick up is a pack of darning needles or yarn needles. We will need these eventually to weave in the loose ends of our finished projects.
Materials Summary
- 5 mm crochet hook
- 100% acrylic weight 4 yarn (I would recommend you start with a light or multicolored yarn)
- Darning/yarn needles
Lesson 1: Slip Knots and Chains
Alright we have finally made it to the first lesson! Gather your materials and get comfy – today you become a crocheter! You should have:
- 5 mm crochet hook
- 100% acrylic weight 4 yarn
- scissors
Check out the video on my youtube channel to follow along.
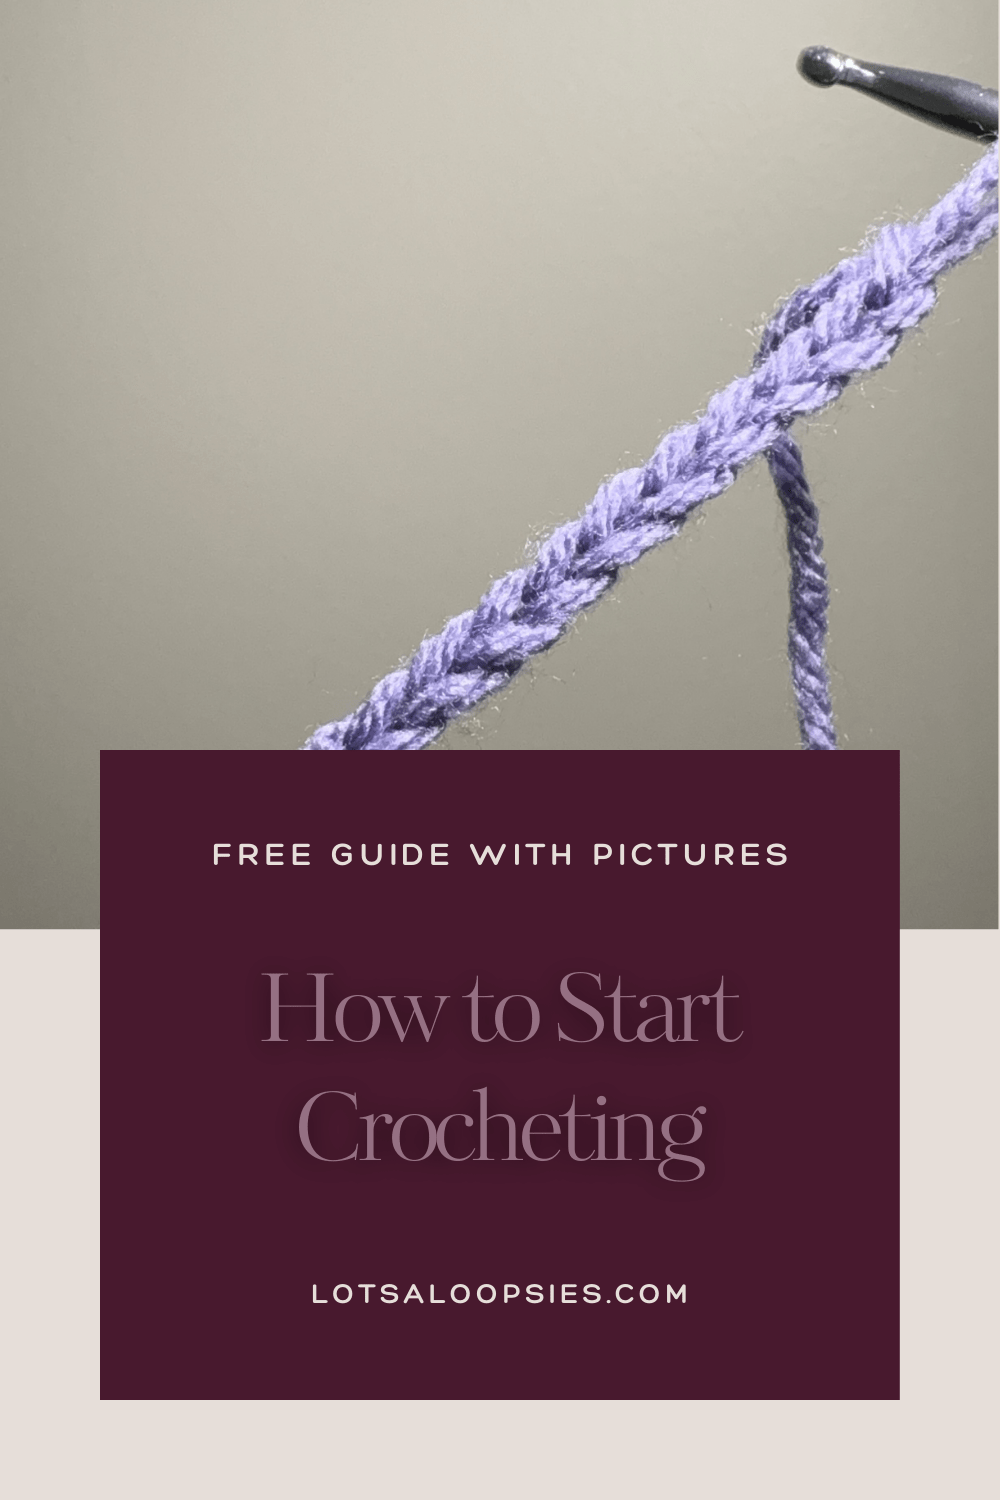
The Slip Knot
There are many ways to start a slip knot out there on the web but this is my favorite way to start my projects.
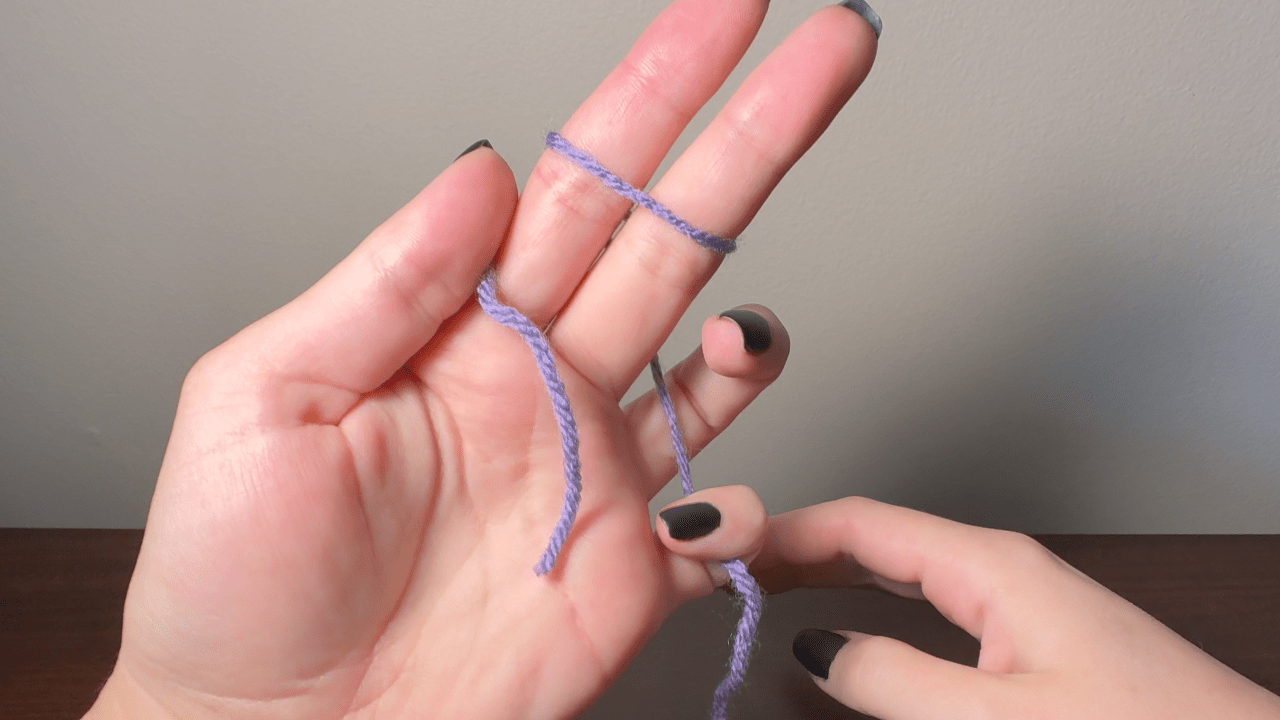
Find the loose end of your yarn. (How to center pull yarn).
Take the tail end of the yarn and pinch it between your thumb and pointer finger, draping the rest of the yarn over the back of your fingers.
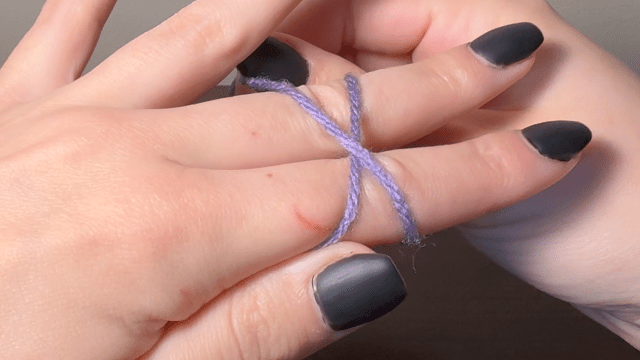
Wrap the yarn around your first two fingers once, until there is an X formed with the yarn on the back of your fingers. Hook the yarn under your pinky to keep the tension.
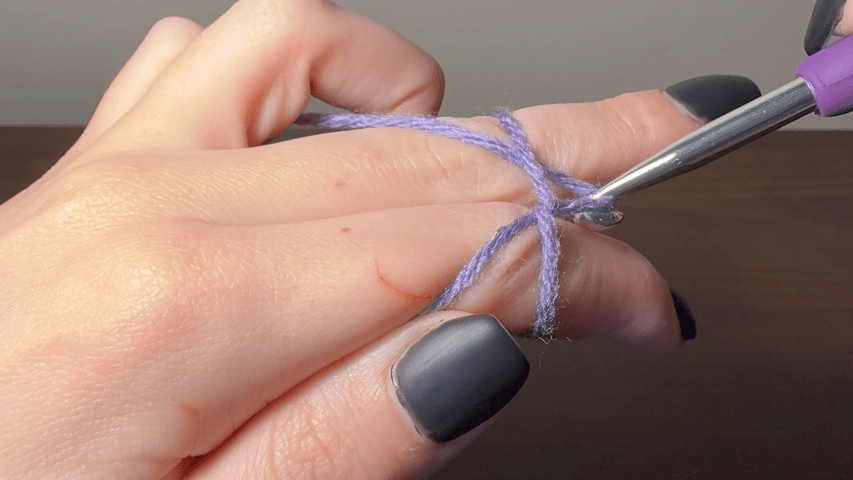
Slide your hook under the bottom string of the X and then slide it over the top string, hook it and pull the hook back through the bottom string. You should now have a loop on your hook and a loop around your two fingers. Slide your fingers out of the loop and pull the working yarn tight to the hook.

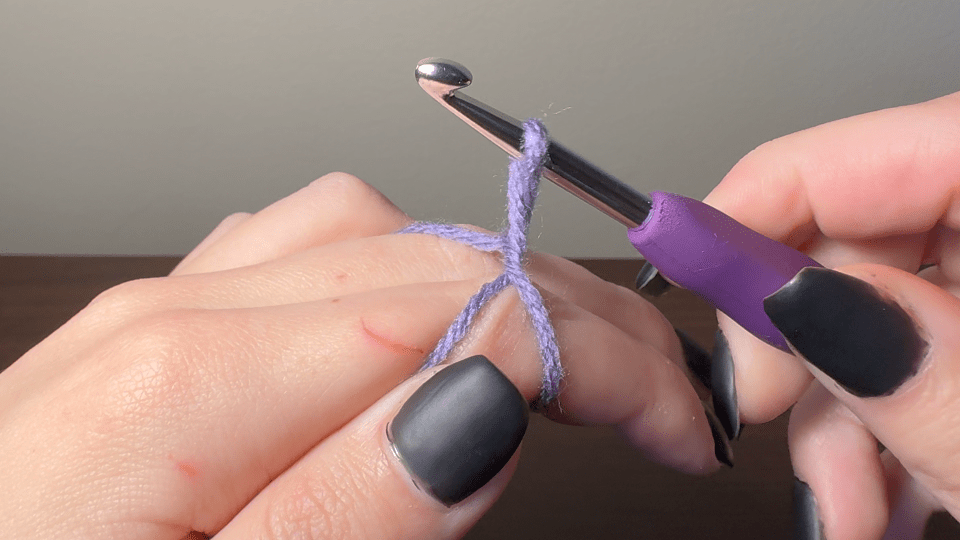
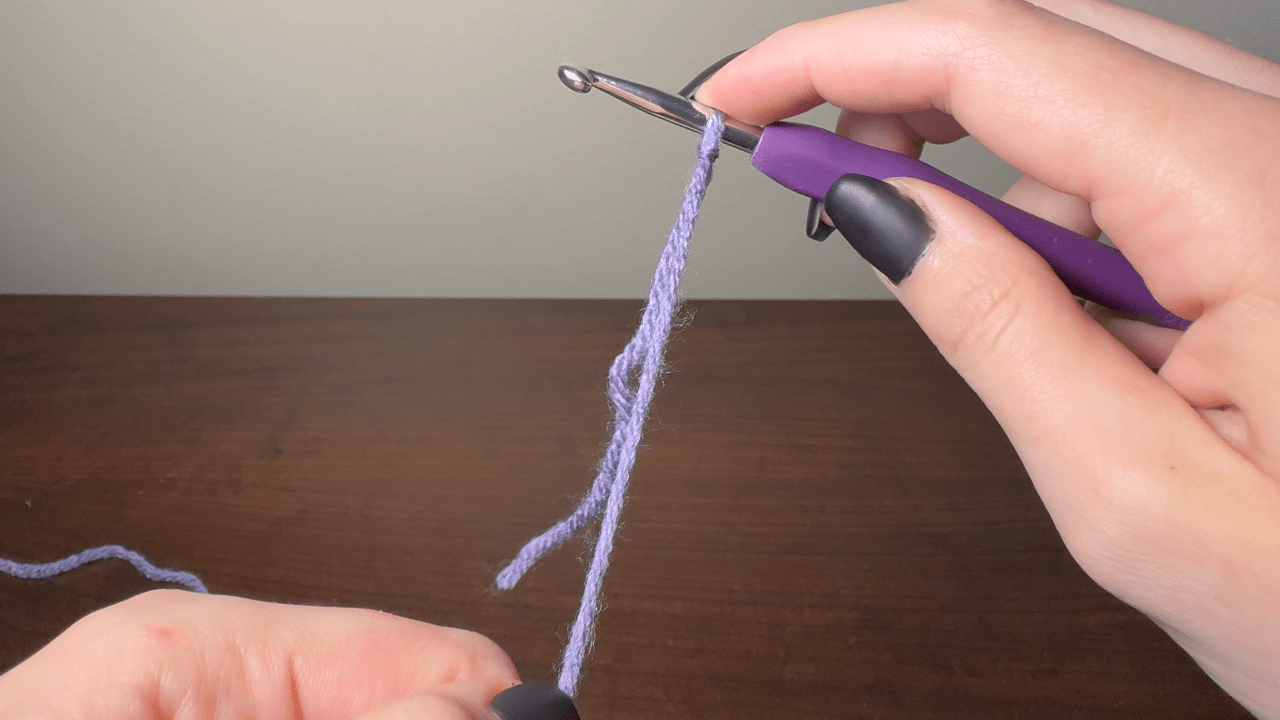
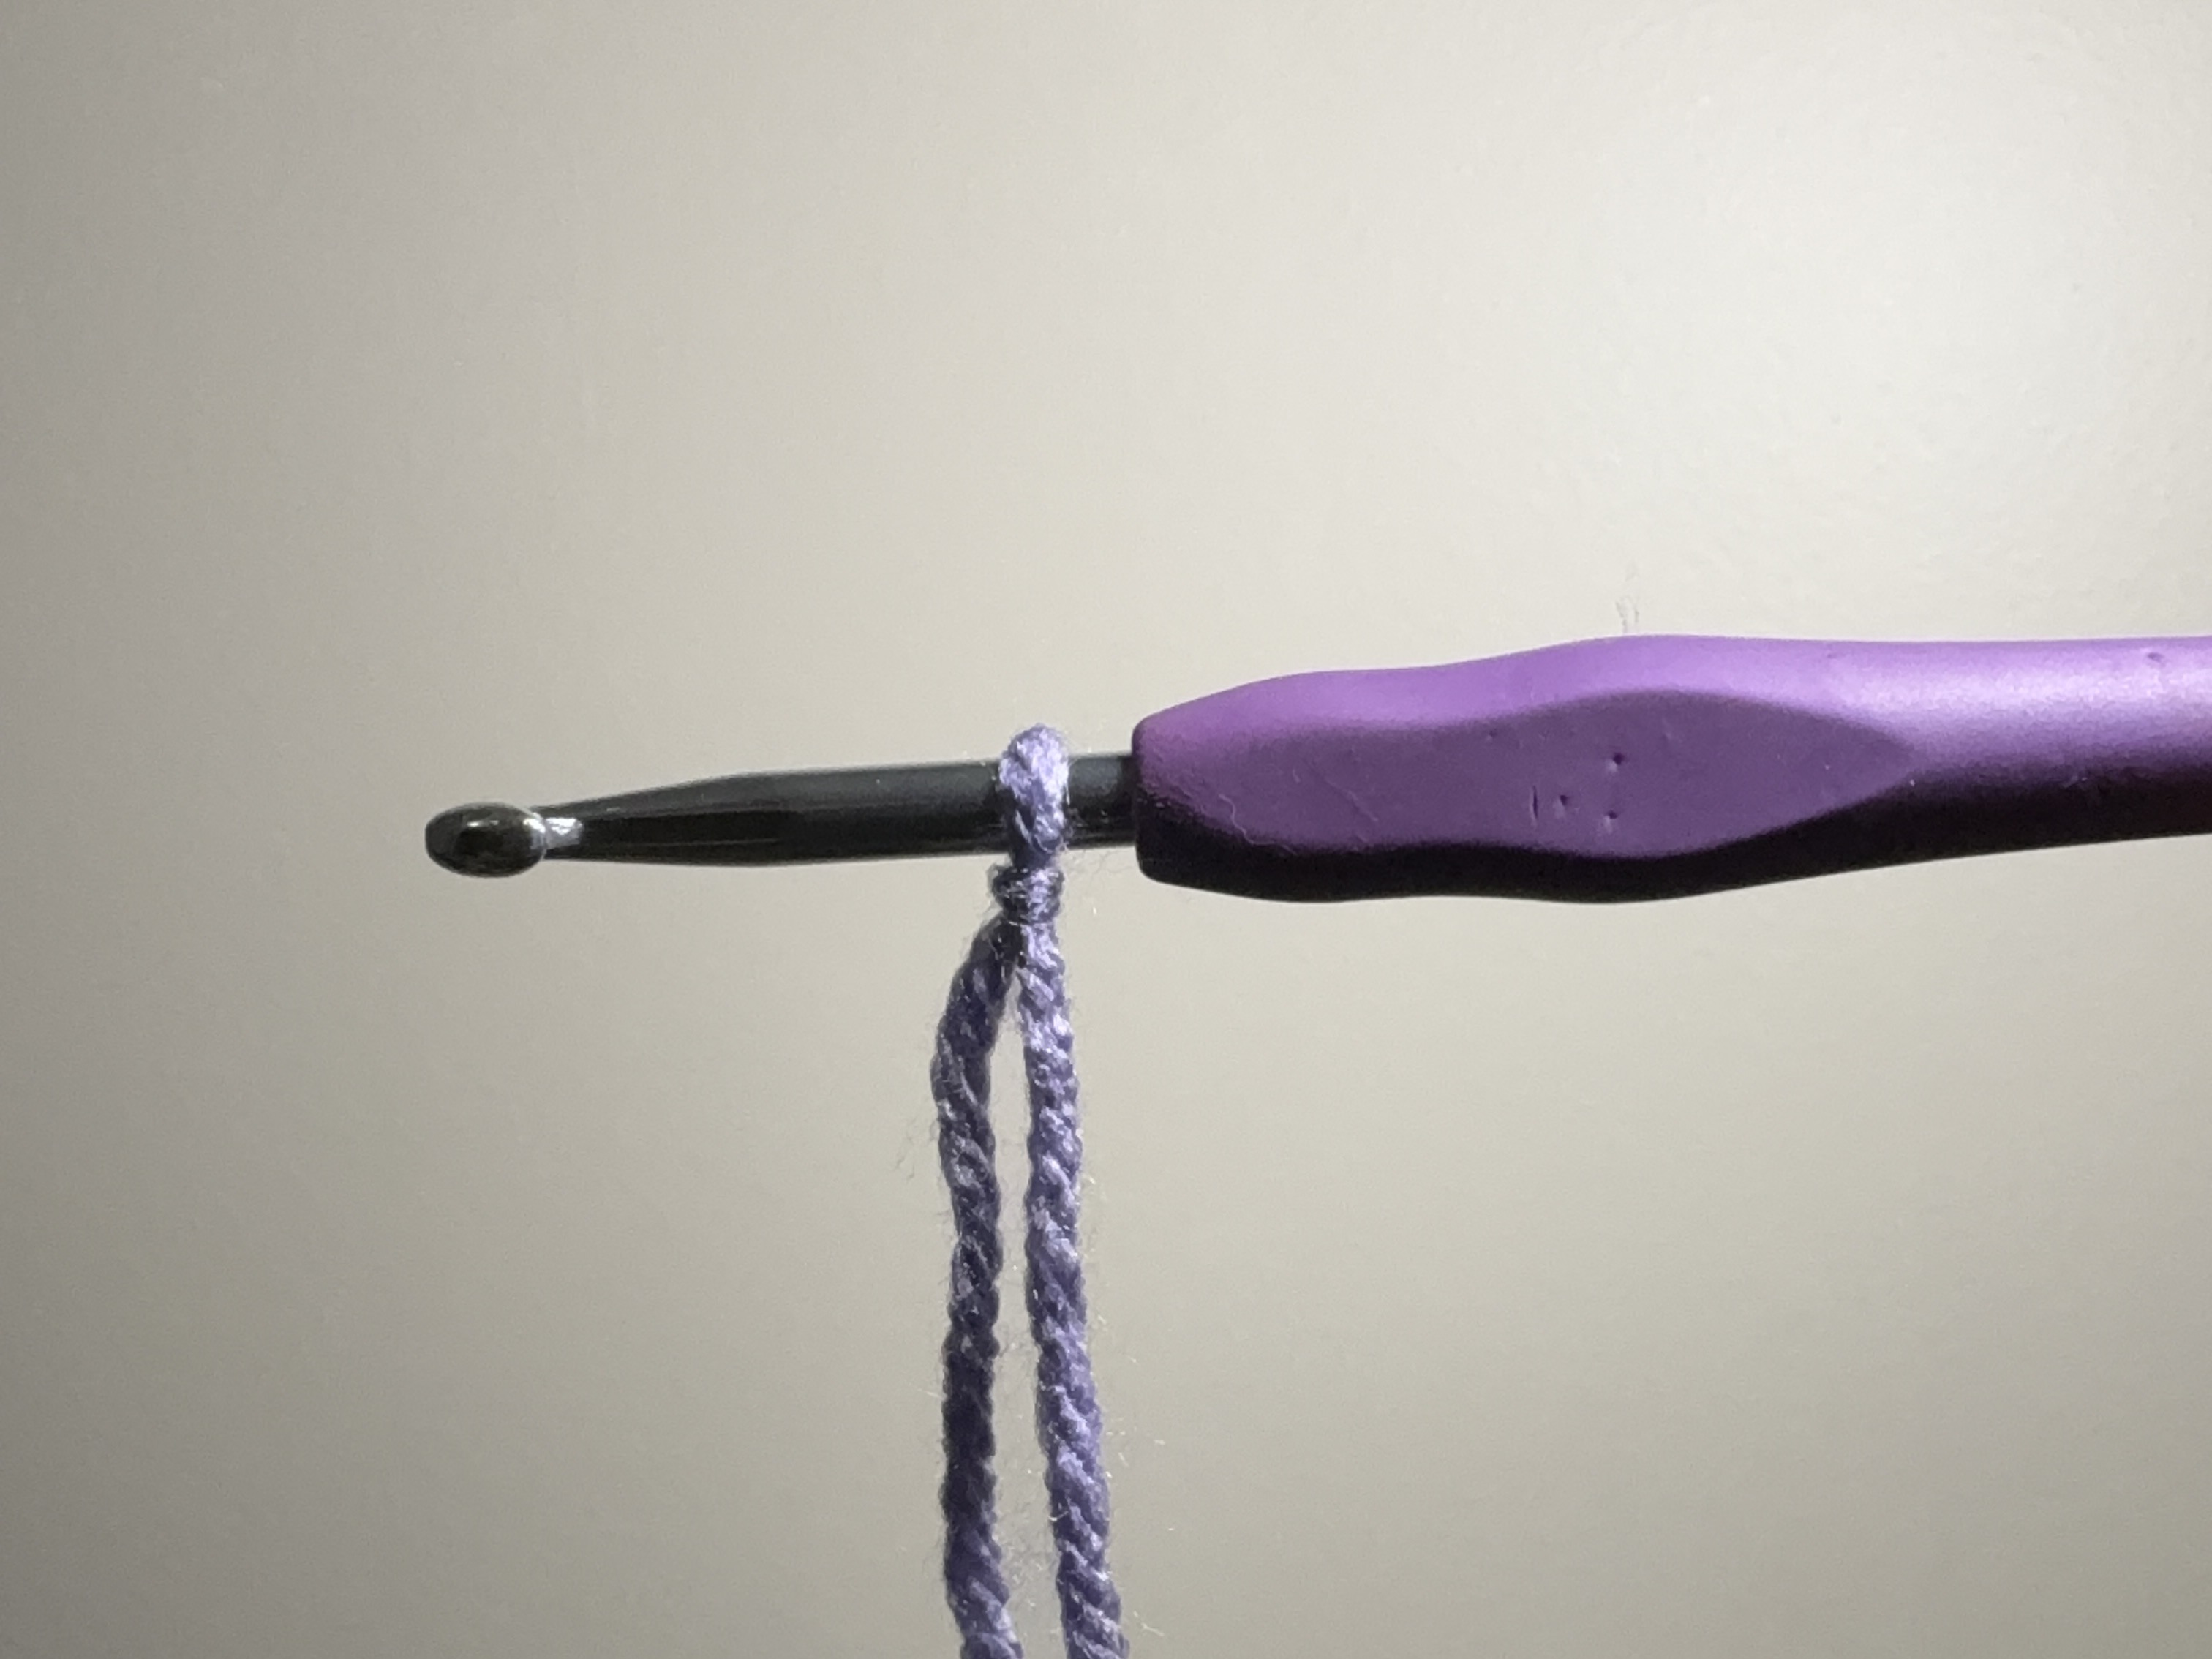
There you go! You now have a slip knot on your hook. Now you have the tail of your yarn (the loose end) and the working yarn (the part still attached to the ball of yarn). Next we will learn our first stitch – the chain!
The Chain
To begin I am going to teach you some common crochet “slang”.
- YO – yarn over. When you wrap the working yarn around the back of the hook to create a loop.
- CH – chain stitch. The most simplistic crochet stitch there is. The foundation of almost every project.
These will commonly appear in patterns and crochet spaces so it’s good to start using the terms early.
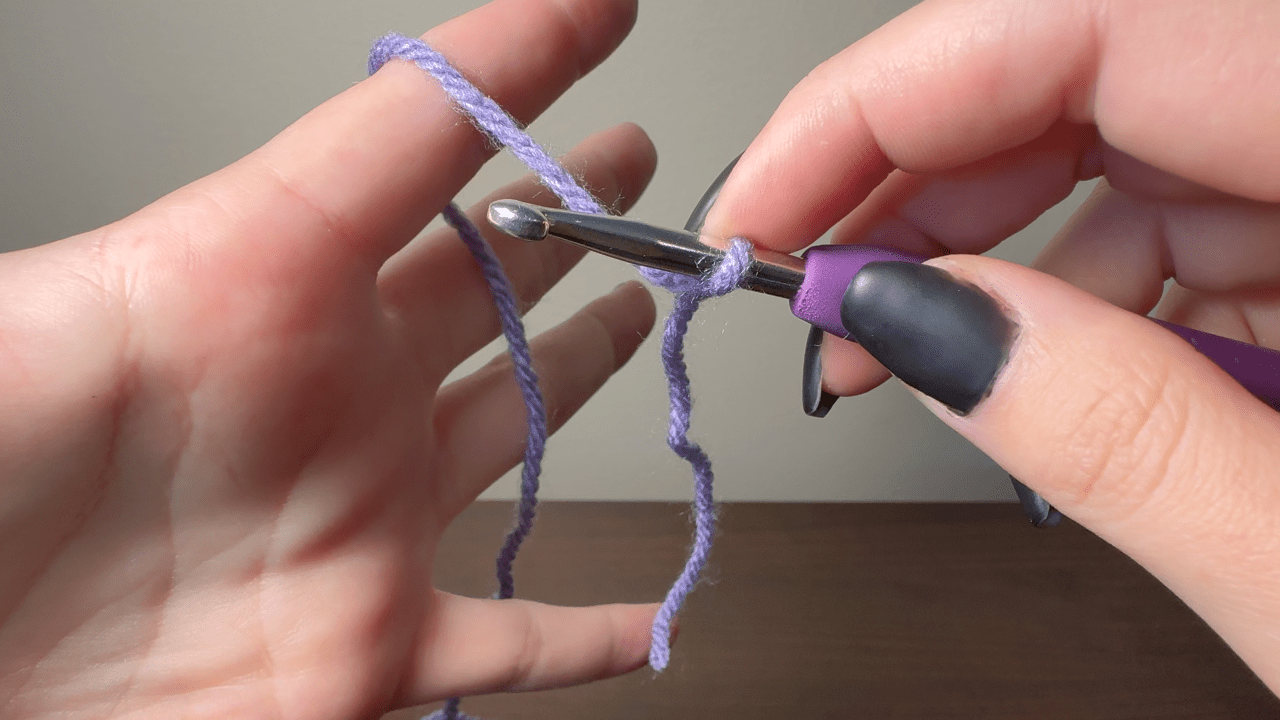
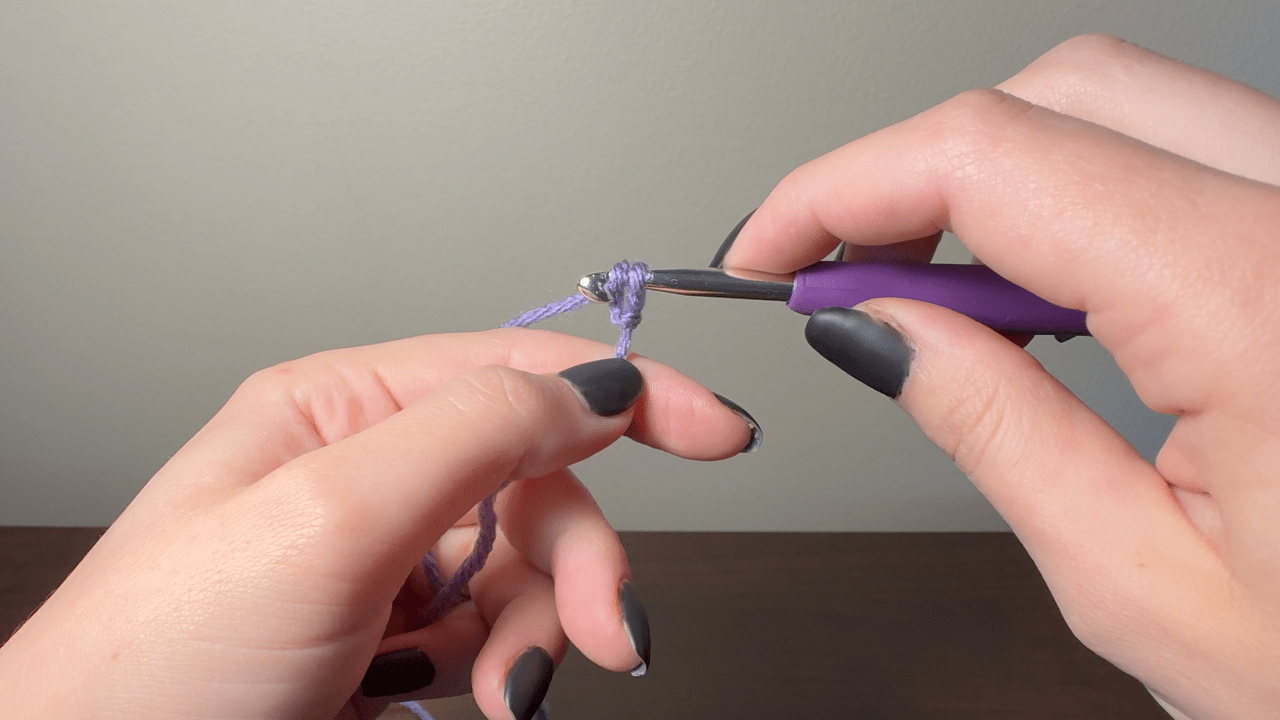
So to start making our chain, you will hold the hook in your dominant hand with the hook parallel to the ground and the hook part facing you with the knot and tail of the slip knot pointing down to the ground.
Now, while holding the tail steady, and while keeping tension on the working yarn, YO and pull the loop through the original loop on the hook by rotating the hook down to the ground to pull the loop through. You can keep constant tension on your working yarn by weaving the yarn over your pointer finger, under your middle and ring finger, and then over your pinky. Allow the yarn to smoothly glide through your fingers, raising your pointer finger to fine tune the tension. When it feels right, you will know it – you wont feel like you’re fighting your yarn anymore.
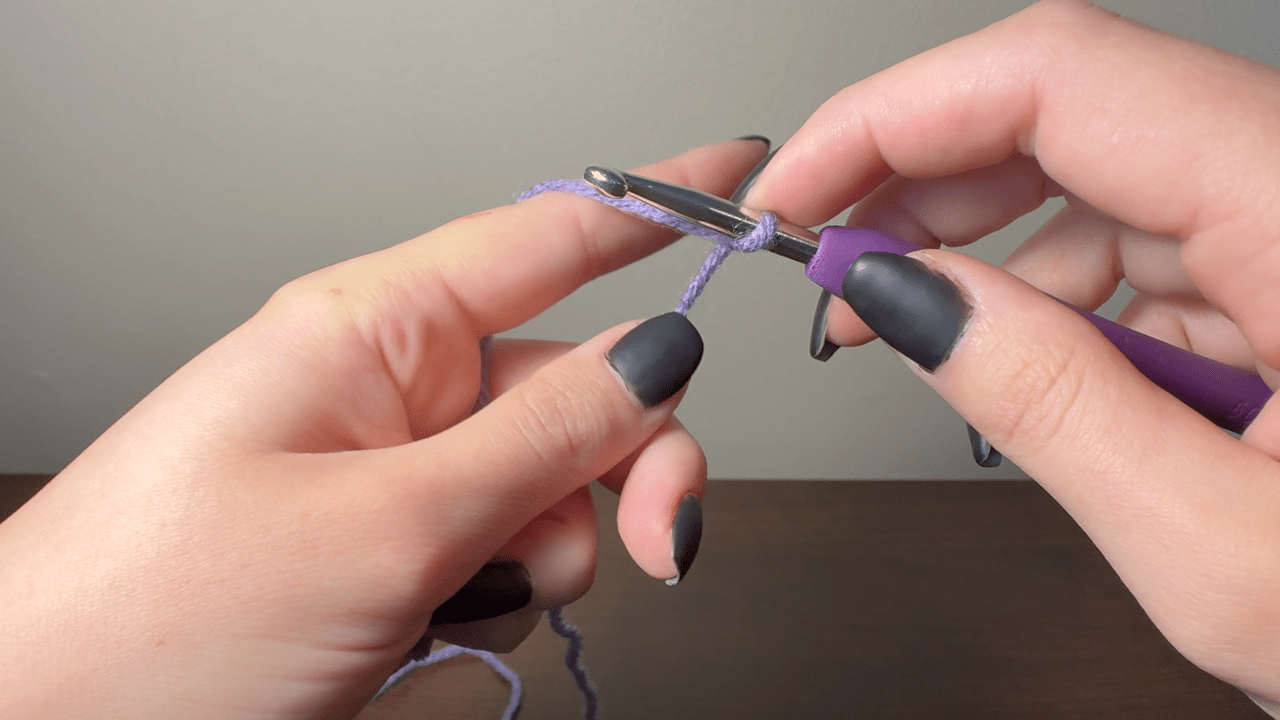

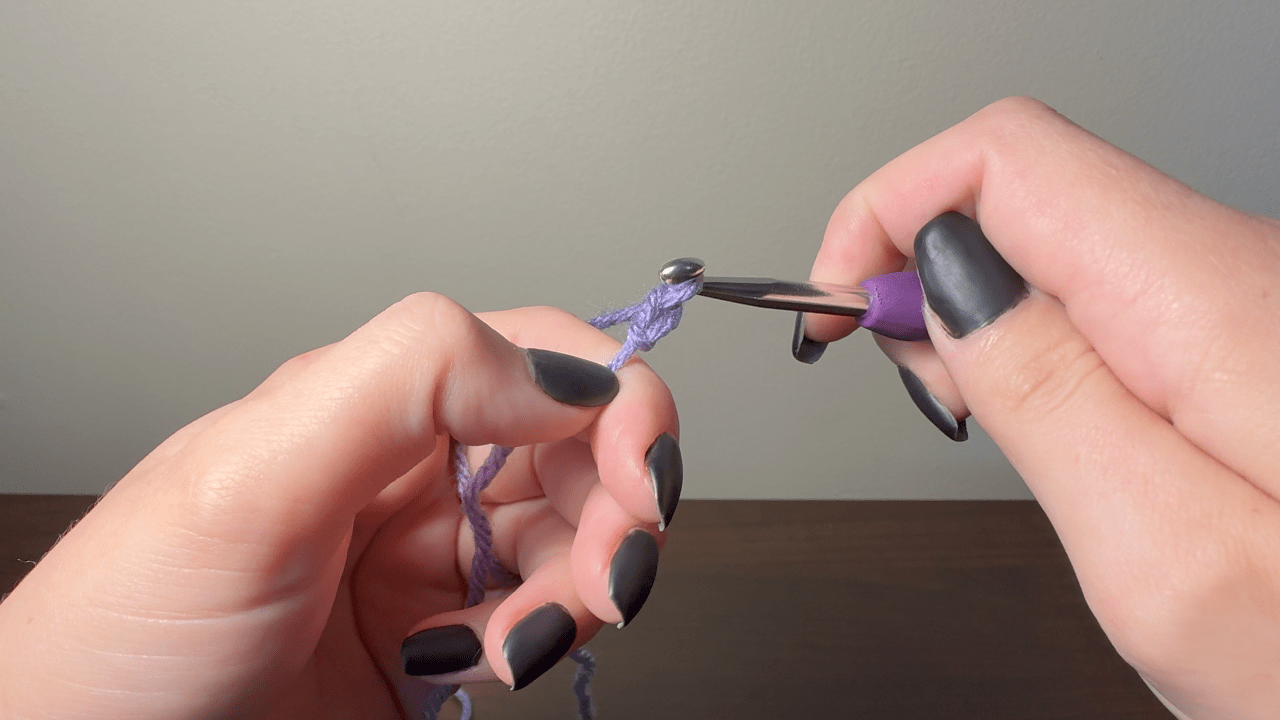
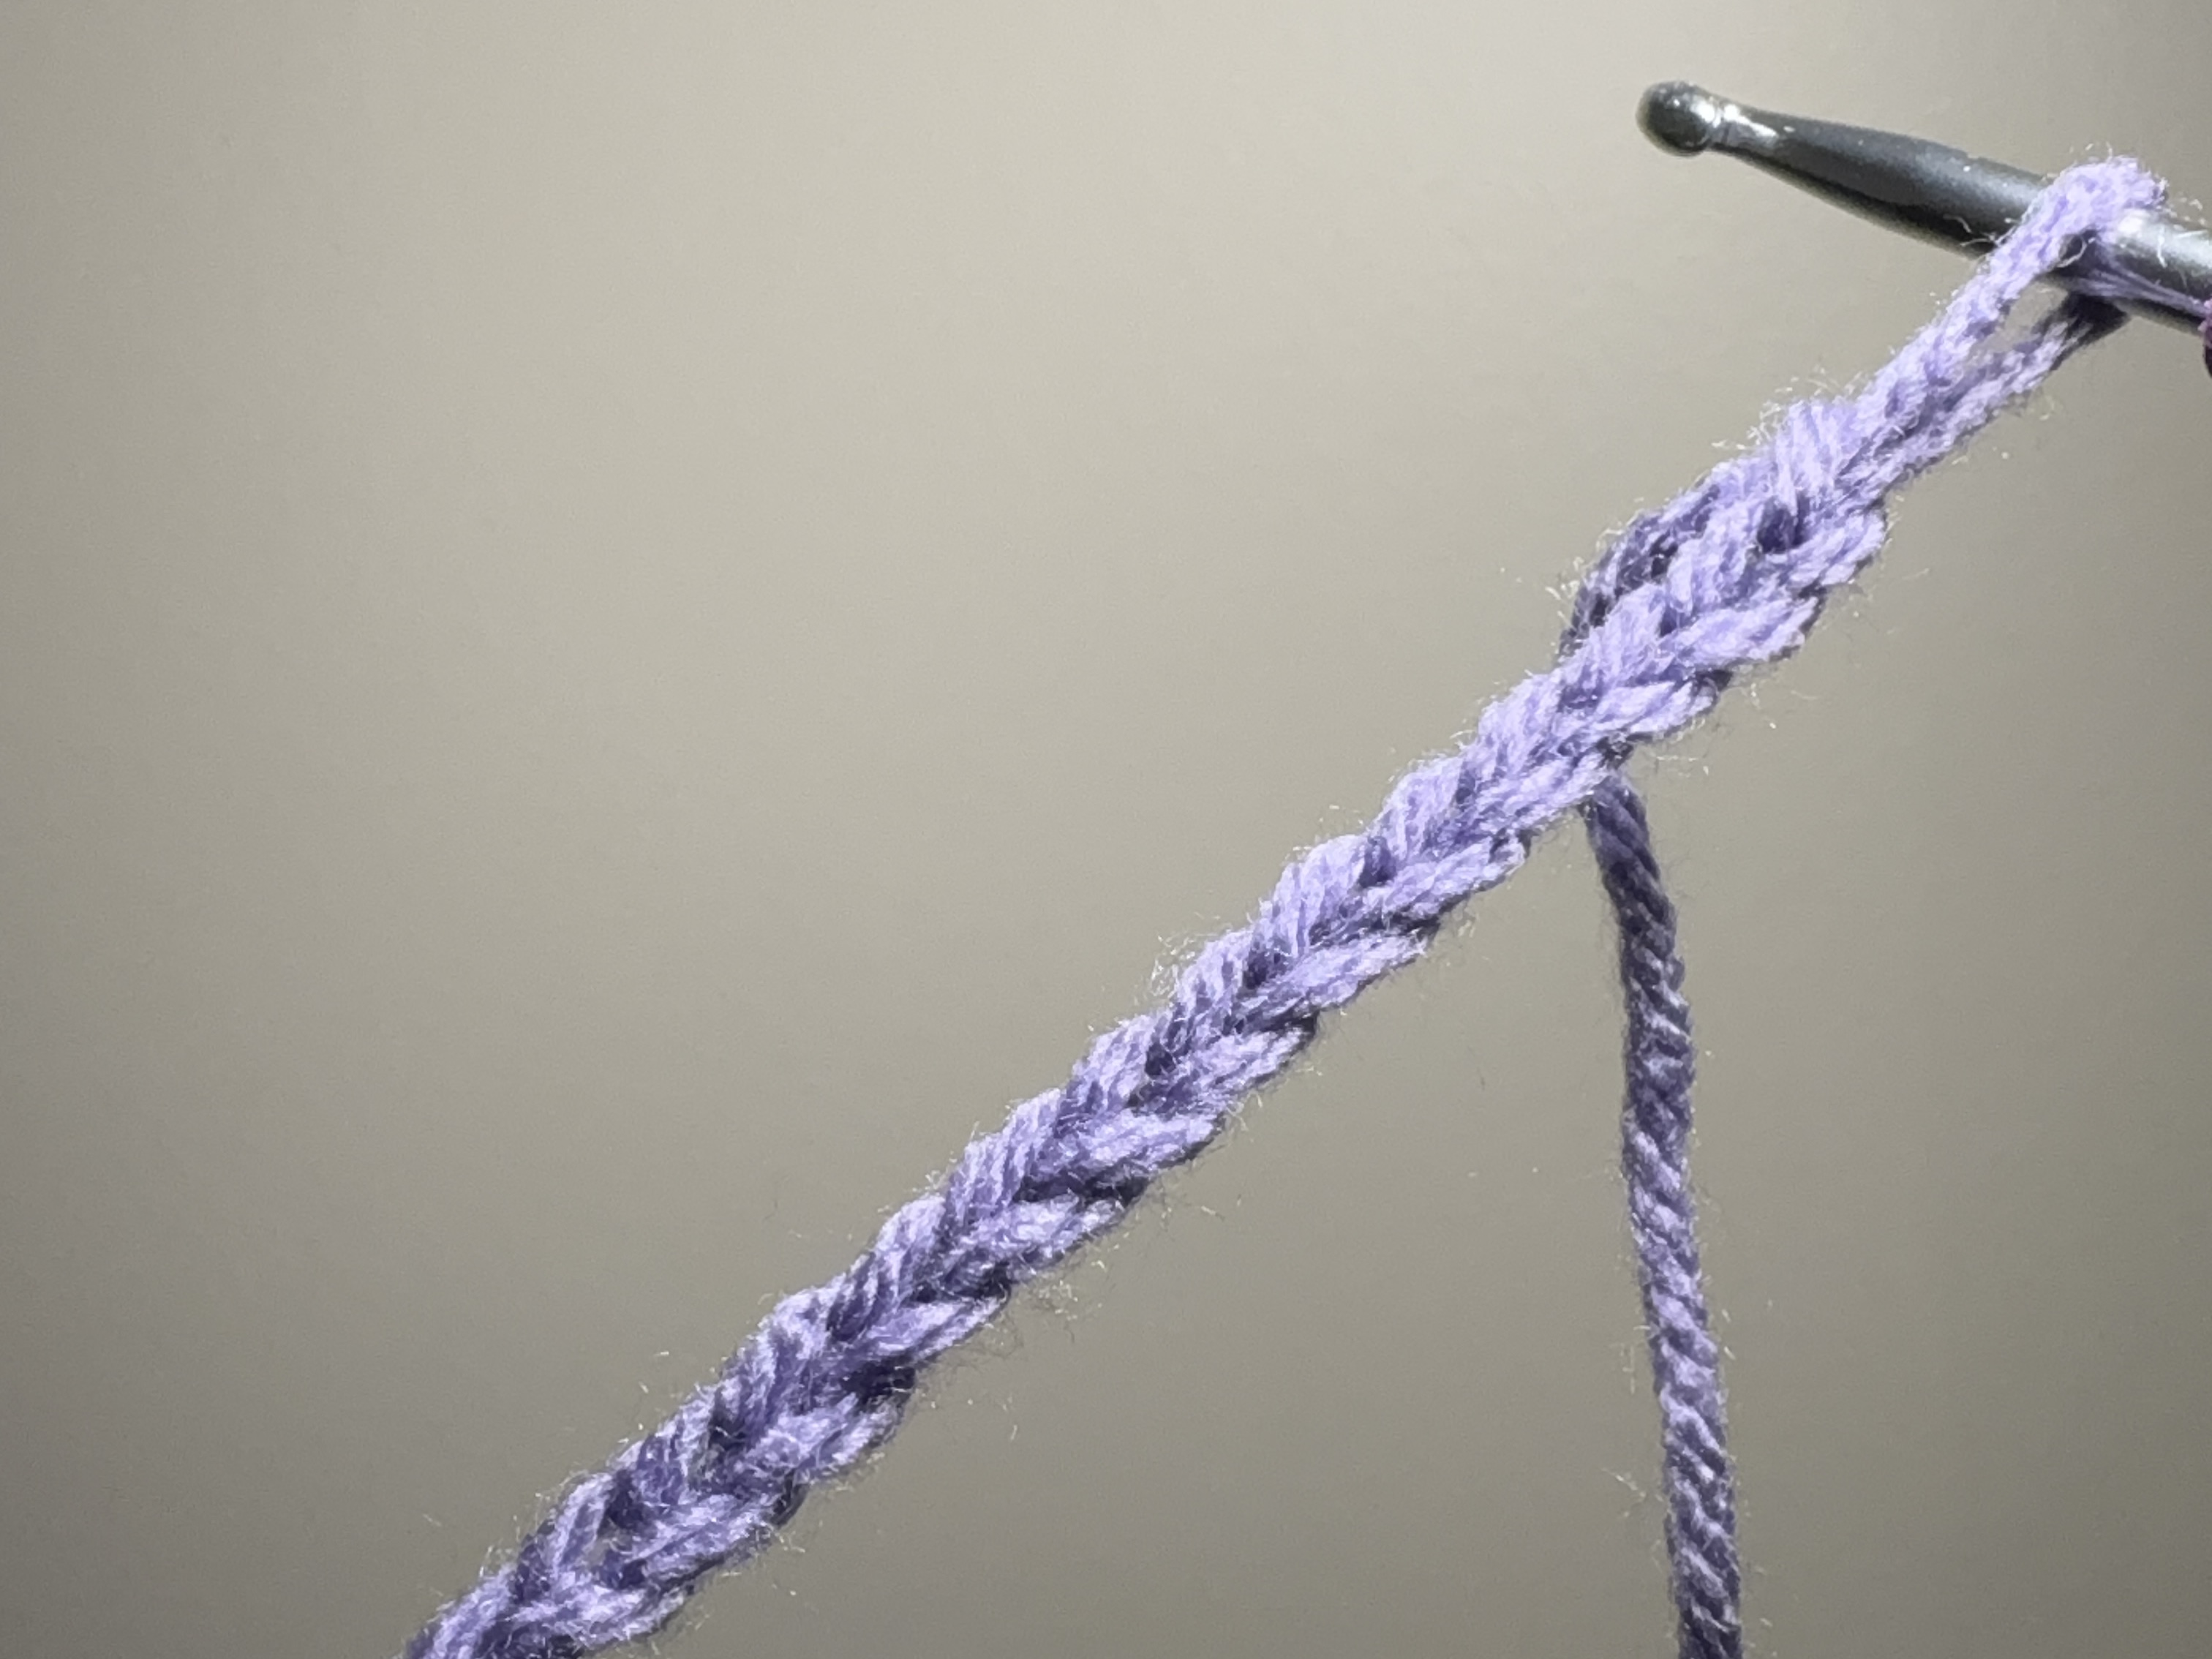
CONGRATS! You just completed your first stitch. Now repeat this yarn over and pull through, keeping your chain pinched between your thumb and index finger until you have a long chain. You can keep adding to this chain everyday as you practice or you can “frog” your work, which means to undo, by taking out your hook and pulling the yarn until the whole chain is unraveled.
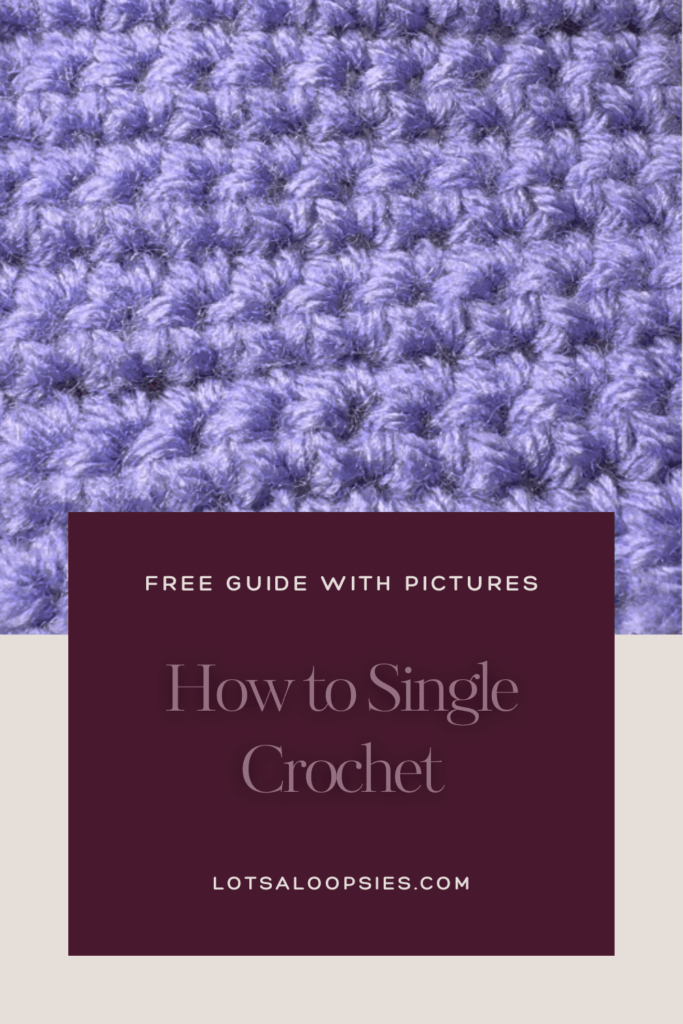
This chain is only for practice. I want you to really focus on getting that tension feel down and building the muscle memory in your hands. The only way to do that is practice. Practice this chain until it feels almost natural and then we can move on to learning to single crochet. I know it feels monotonous and boring but stick with it and we will be making beautiful creations in no time.
Thanks for reading! If you enjoyed this tutorial and want to see more, or have any burning questions, let me know! Leave a comment and share this with anyone who might enjoy it.