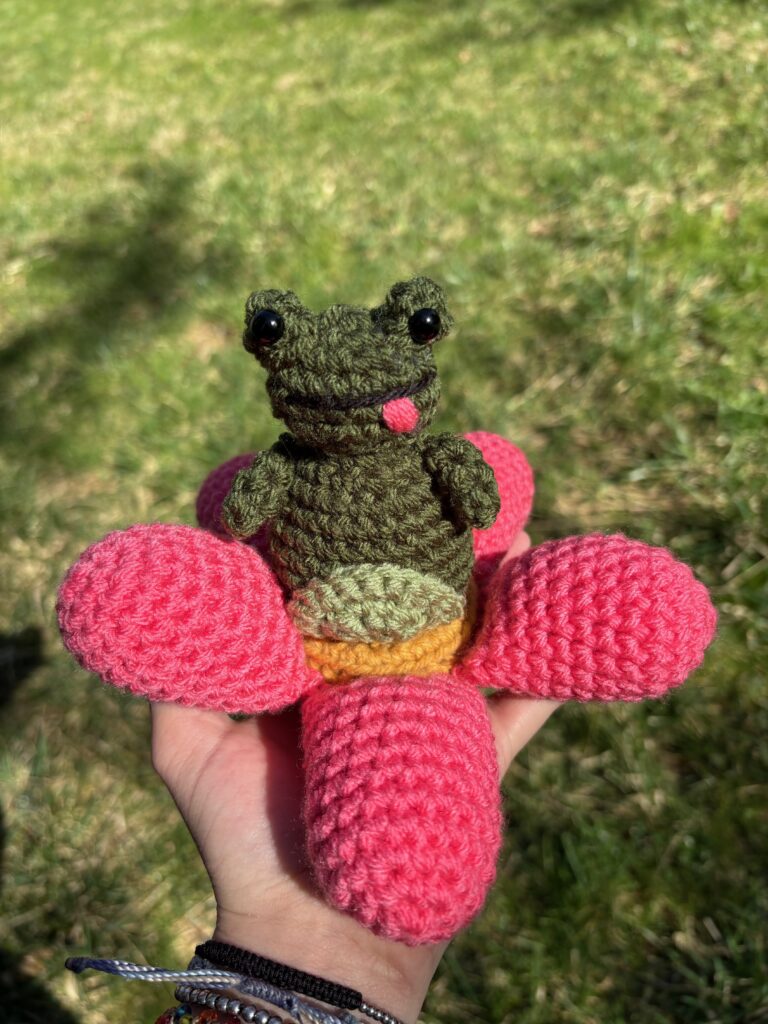
This free spring crochet plush is the perfect crochet project to kick off the spring season! Using simple techniques, you too can create this vibrant plush decor to set around your home too! So grab your hook and let’s get stitching!
Overview
This pattern is worked in rounds, which means the first stitch of each round is worked into the first stitch of the previous round. Any stitches written in brackets will be repeated however many times indicated by the number outside of the brackets ex: [inc, sc] x6 would be [the inc in the first stitch, then sc worked in the next stitch] repeated 6 times for 18 total stitches. The stitch count at the end of each row will be in parentheses at the end of each written row.
I used worsted weight acrylic yarn but this pattern could be made using any yarn type and hook size. This plushie can be completed in one day and its finished size is approximately 4.5 in (11.4cm) by 7.5 in (8.4cm) wide.
NOTICE: You may not redistribute this pattern. You may sell the items you make with the pattern with credit to me (lotsaloopsies) as the pattern author.
Table of Contents
If you would like a PDF downloadable pattern with pictures for each step, they are available for on my Etsy shop and Ravelry.
Stitches
The following is the list of stitches and abbreviations used to complete Frog in Bloom:
- mr – magic ring
- sl st – slip stitch
- ch – chain
- sc – single crochet
- inc – single crochet increase (two single crochets into one stitch)
- dec – single crochet decrease (pick up two stitches in one single crochet)
- blo – back loop only (crochet around the back loop of the top loops)
Materials
You will need the following materials to complete Frog in Bloom:
- I Love This Yarn – Dark Olive (less than 25 yds)
- I Love This Yarn – Light Sage (less than a 5 yds)
- I Love This Yarn – Pink (about 80 yds)
- Yarn Bee – Gold (about 10 yds)
- Black scrap yarn or thread for mouth
- Pink scrap yarn or thread for tongue
- 5 mm crochet hook
- Yarn needles
- Polyfil fiber fill
- Scissors
- Stitch markers
- 2 8 mm safety eyes
The Pattern
Flower
Center – Gold Yarn
Start with a mr.
R1 sc 6 into mr (6)
R2 [inc] x6 (12)
R3 [sc, inc] x6 (18)
R4 [inc, sc 2] x6 (24)
R5 [sc3, inc] x6 (30)
R6-7 sc 30 into the blo (30)
R8 [sc 3, dec] x6 (24)
R9 [dec, sc 2] x6 (18)
R10 [sc, dec] x6 (12)
Stuff with fiber fill.
R11 [dec] x6 (60)
Sew closed and weave in end through.
Petals – Pink Yarn (MAKE 5)
Start with mr.
R1 sc 6 into mr (6)
R2 [inc] x6 (12)
R3 [sc, inc] x6 (18)
R4-11 sc 18 (18)
R5 [sc, dec] x6 (12)
Stuff tightly with fiber fill.
Tie off and leave long tail for sewing. Repeat 4 more time for 5 petals.
Frog
Head and Body – Dark Olive Yarn
Start with mr.
R1 sc 6 into mr (6)
R2 [inc] x6 (12)
R3 [sc, inc] x6 (18)
R4-5 sc 18 (18)
R6 [sc, dec] x6 (12)
R7 [dec] x6 (6)
R8 [inc] x6 (12)
R9 [sc, inc] x6 (18)
R10 {inc, sc 2] x6 (24)
R11-15 sc 24 (24)
R16 [sc 2, dec] x6 (18)
R17 [dec, sc] x6 (12)
Stuff with fiber fill, making sure the head gets filled.
R18 [dec] x6 (6)
Sew bottom closed, weave loose end back through body to secure.
Eyes – Dark Olive Yarn (MAKE 2)
Start with a mr.
R1 sc 4 into mr (4)
R2 sc 4 (4)
Turn right side out and roll between fingers to shape.
Tie off and leave long tail for sewing.
Place a safety eye between any of the stitches.
Arms – Dark Olive Yarn (MAKE 2)
Start with a mr.
R1 sc 4 into mr (4)
R2-4 sc 4 (4)
Turn right side out and roll between fingers to shape.
Tie off and Leave long tail for sewing.
Belly – Light Sage Yarn
Start with mr.
R1 sc 3 into mr, turn (3)
R2 [inc] x3, turn (6)
R3 [sc, inc] x3, turn (9)
R4 [sc 2, inc] x3 (12)
Tie off and leave tail for sewing.
Assembly
Flower
Take each petal and sew them into the back loops of R7 of the center piece. Pinch the bottom of the petal closed into a flat edge and seam shut as you sew onto the center. Each petal should be sewn into 6 stitches on the center. Weave all loose ends back through the flower.
Frog
Sew your eyes covering R2 and R3 of the head, equal distance apart. Weave any loose ends back through the body.
Sew the belly portion onto the front side of your frog, lining the bottom of the semi circle up with R15 of the body and center it with your eyes and head. Weave loose ends back through the body.
With your black and pink scrap yarn or thread, embroidery a mouth and a tongue onto the face of your frog.
Sew your arms on the sides of the body, facing towards the belly around the neck of thee frog. You can pin the arms down with an additional stitch or leave them unpinned.
Position your frog in the center of your completed flower. It should sit nicely centered around R4 of your flower center. With a long piece of dark green yarn, begin sewing R15 of the frog to R4 of the flower center.
Congratulations! You just completed your Frog in Bloom plush! Enjoy! 🙂
Thanks for reading! If you enjoyed this post and want to see more, or have any burning questions, let me know! Leave a comment and share this with anyone who might enjoy it.